1
/
of
3
Solar Well Pumps Online
Paddle Float Switch
Paddle Float Switch
Regular price
$58.00 USD
Regular price
Sale price
$58.00 USD
Unit price
/
per
Couldn't load pickup availability
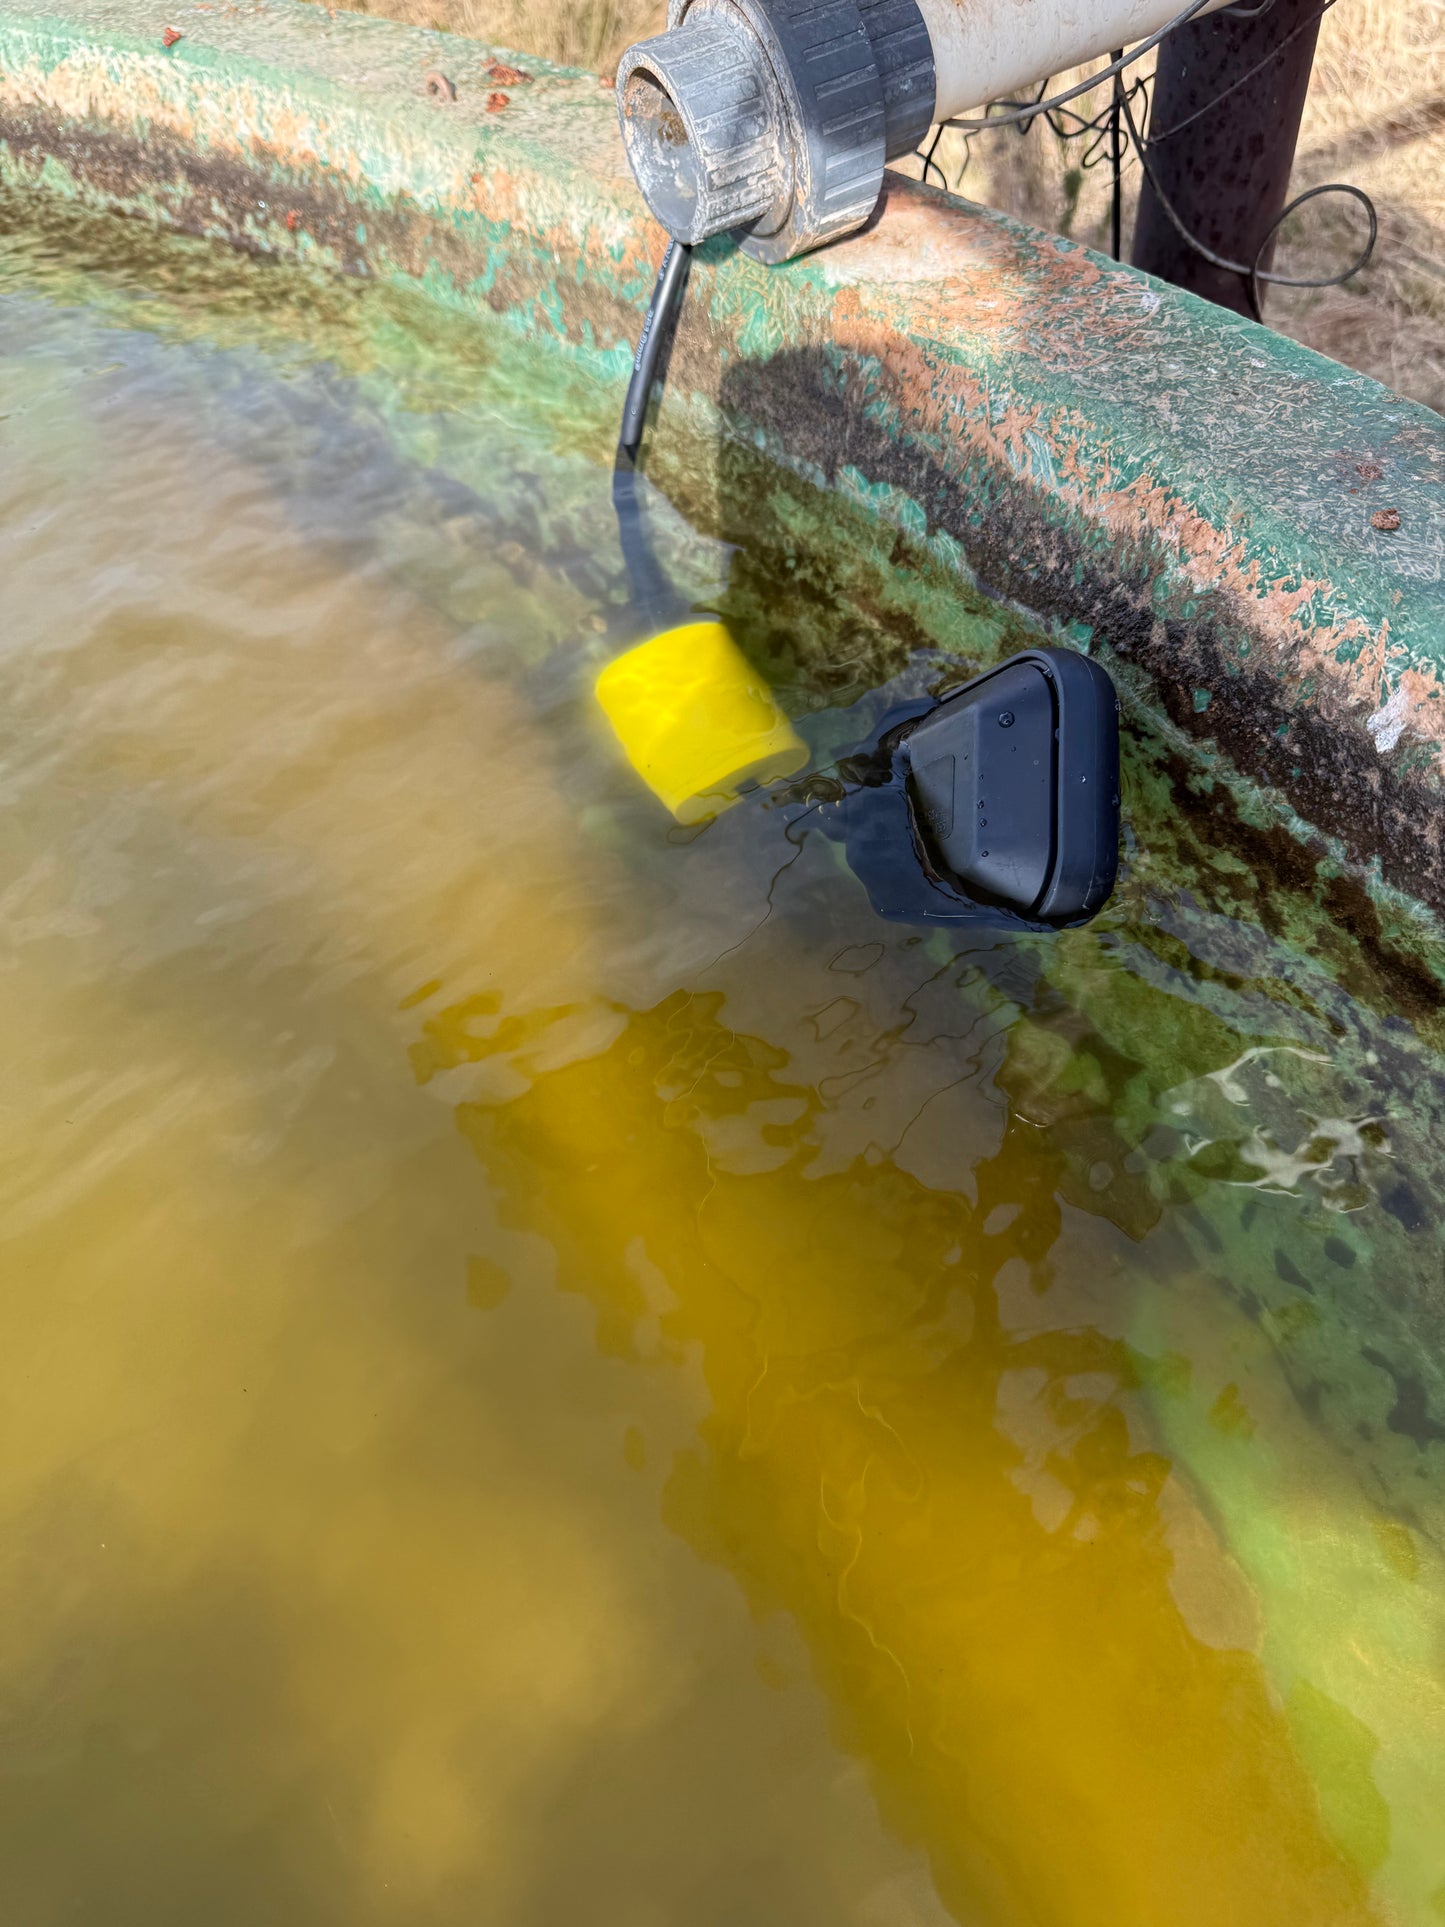
A 3-wire paddle-style float switch functions as a
Single Pole Double Throw (SPDT) device, allowing you to choose between "Pump-Up" (filling) and "Pump-Down" (emptying) operations by selecting the correct pair of wires.
The standard wiring for most 3-wire float switches uses Black as the Common wire. To achieve your desired shutoff behavior, connect as follows:
-
Tank Full Shutoff (Pump-Up / Filling)
- Goal: The pump runs when the float hangs down (tank empty) and stops when the float rises (tank full).
- Wiring: Use Black (Common) and Blue (Normally Closed) wires.
- Action: The circuit is closed when the float is down, providing power to the pump. The circuit opens when the float reaches the "up" position, cutting power.
- Note: Cap off the unused Brown wire.
-
Tank Empty Shutoff (Pump-Down / Draining)
- Goal: The pump runs when the float is up (tank full) and stops when it hangs down (tank empty) to prevent dry-running.
- Wiring: Use Black (Common) and Brown (Normally Open) wires.
- Action: The circuit is open when the float hangs down (at rest), meaning no power flows. It only closes and activates the pump when the water level lifts the float.
- Note: Cap off the unused Blue wire.
Technical Specifications
Voltage/Current: Rated for up to 240VAC and 150VDC with a maximum current of 16A.
- Direct Control: Can directly control small motors (typically up to 1/2 HP or 13A-16A depending on the specific model). For larger motors, wire the float switch to a magnetic contactor instead of directly to the pump.
- Grounding: Always ensure the pump and system are properly grounded using the green or bare copper wire from your power source.
- To set the specific water levels where your pump turns on and off, you’ll
-
use the sliding counterweight included with the float. This acts as a pivot point; the longer the cable between the weight and the float, the larger the "swing" (the distance between start and stop).
-
Step-by-Step Adjustment
- Insert the Cable: Slide the float cable through the center of the counterweight. Most weights have a plastic locking clip or a tapered ring to hold it in place.
-
Determine the Pivot Point:
- For a small level change (e.g., 6–10 inches), place the weight closer to the float (about 4–5 inches away).
- For a large level change (e.g., 2–3 feet), slide the weight further back along the cable.
- Secure the Weight: Snap the locking clip into the groove of the counterweight to "pinch" the cable. This ensures the weight doesn't slide when the water level shifts.
-
Position in the Tank:
- Low Point: The pump will stop (or start) when the float hangs vertically below the weight.
- High Point: The pump will start (or stop) when the float is buoyed up and tilts past the horizontal plane of the weight.
- Dry Run Test: Before filling the tank, manually lift and lower the float. You should hear a distinct "click" from the internal ball bearing as it passes the pivot point, indicating the switch has triggered.
Pro-Tips for Stock Tanks- Clearance: Ensure the float has enough room to swing without getting caught on the tank wall or your aerator plumbing.
- Minimum Tether: Never set the weight closer than 4 inches to the float, or it may not have enough leverage to tilt the internal switch.
- Alternative: If your tank is shallow, you can zip-tie the cable to a weighted PVC pipeinstead of using the sliding weight to keep it from drifting.
Share